Dashboard Contents
The Discovery Scan Dashboard can be configured to show a variety of reports. The reports can be added, removed, and placed in various locations on the Dashboard. Each report has options for generating or saving the report.
|
1.
|
In the navigation pane, select Discovery Scan > Dashboard. The Dashboard window displays. |
|
2.
|
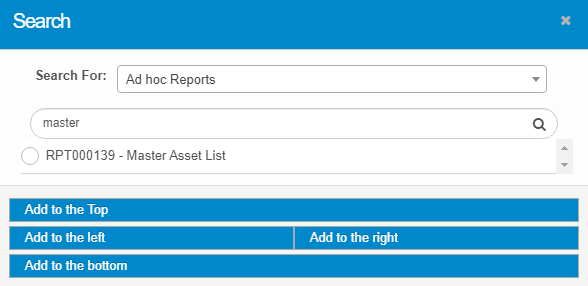
Click the Add Contents button. The Search window displays. |
|
3.
|
In the Search For field, click the drop-down list and choose the desired report.
|
|
4.
|
If a text field displays, do the following: |
|
a.
|
Enter the search criteria in the field and click the Search icon. A list of results displays.
|
|
b.
|
Either click the radio button next to the desired report OR enter different criteria and search again. |
|
5.
|
Select a location for the report to display on the dashboard. For example, "Add to the Top" will place the report at the top of the Dashboard above all other reports currently shown.
|
| |
Once you place a report on the dashboard, it cannot be moved. To change the location, remove the report, select it again, and then specify a new location. Also, some reports can only be added to the top or bottom of the report area. This is due to the size of the report. |
Related Topics
Other Functions and Page Elements


