CMDB Graphical Workflow
The Workflow is the sequence or process through which a piece of work passes from Initiation to Completion.
In the main window, click Admin then navigate to required graphical configuration page for functions such as:
Discovery
CMDB
Change
Incident
Problem
Release
Request
The Graphical Workflow window allows you to create conditions and action type showing how the workflow should proceed when events occur.
The window contains the following functions:
File contains options for New, Open and Save.
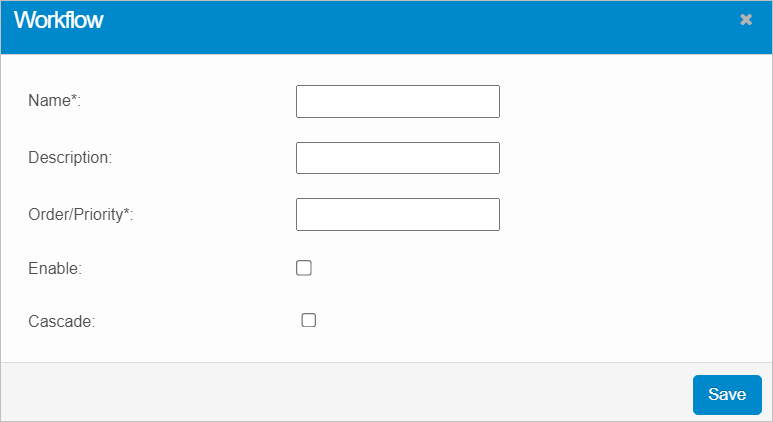
Save opens the Workflow dialog box in which you enter the details for the workflow.
Zoom % sets the resolution for the workflow in the window.
Zoom In/Zoom Out adjusts the workflow window, making the elements larger or smaller.
Undo reverses the last action
Redo reverses the last Undo action
Delete removes the selected element
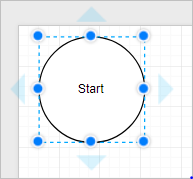
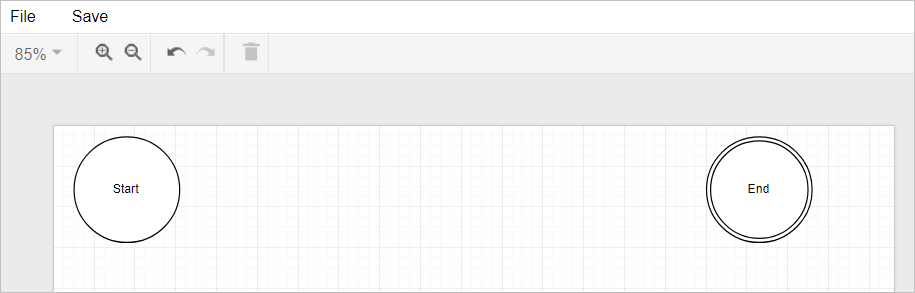
All workflow windows contain a Start and End icon.
|
1.
|
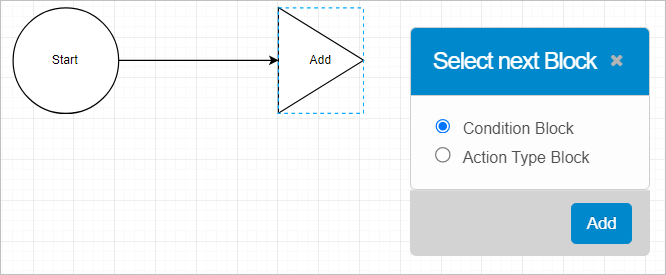
To begin a workflow, hover over the Start element until arrows display. |
|
2.
|
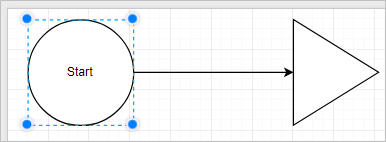
Click the arrow for the direction the next element should be added. The Trigger Condition element (triangle) displays. |
|
3.
|
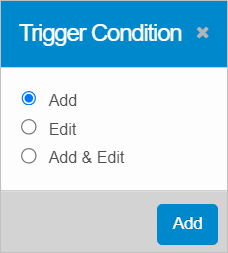
To configure the Trigger Condition, double-click on the shape. The Trigger Condition dialog box displays. |
|
4.
|
Select the applicable condition: Add, Edit, or Add & Edit, then click Add. |
|
5.
|
Hover over the Trigger Condition element until the arrows appear. Then, click the right-facing arrow. The Select next Block dialog box displays. |
|
6.
|
Select the type of block to add, either Condition or Action Type. Then click Add. |
Any example workflow is shown below, followed by the relevant steps.

| |
Every Condition must include an Action Type; however, every Action Type does not need to be proceeded by a Condition. |
Condition Type
When Condition is selected, a diamond element displays.
|
1.
|
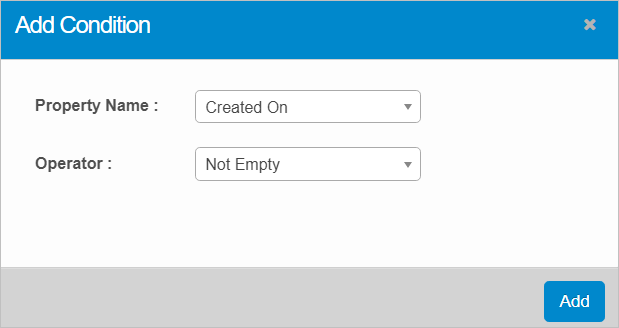
Double-click the diamond shape. The Add Condition dialog box displays. |
|
2.
|
Select the Property Name (Created On) and Operator (Not Empty). |
|
3.
|
Click Add. The workflow window redisplays and shows the newly added element. The Property Name is shown in the shape (for example, Created On). |
|
4.
|
Hover over the diamond shape and click the right-pointing arrow. The Action Type dialog box displays. Following the steps below under Action Type Element. |
|
5.
|
To end the workflow after all Conditions and Action Types are created, do the following: |
|
a.
|
Hover over the last element created. |
|
b.
|
Click the right-pointing arrow. |
|
c.
|
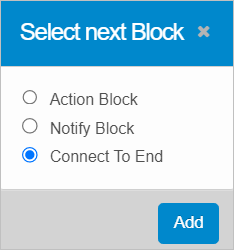
In the Select next Block dialog box, click Connect to End, then click Add. |
The workflow is completed.
Action Type
When Action Type is selected, a square element displays.
|
1.
|
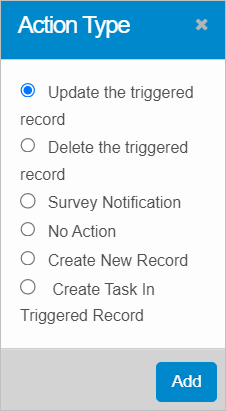
Double-click the square shape. The Action Type dialog box displays. |
|
2.
|
Select the applicable action type from the available choices. |
| |
Some Action Types require additional information.
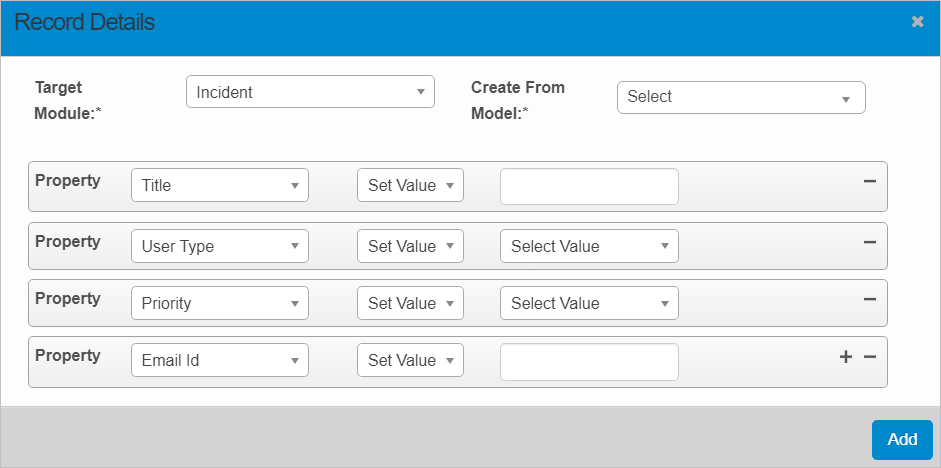
Create New Record. The Record Details dialog box displays. Enter the applicable information for the new record and click Add.
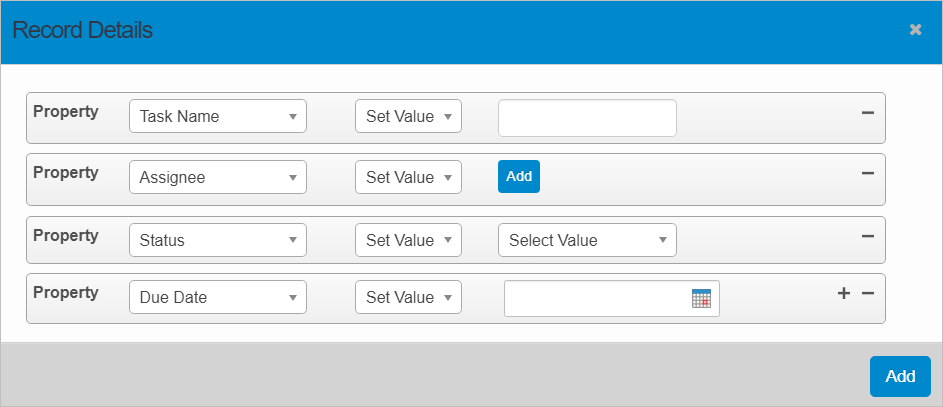
Create Task in Triggered Record. The Record Details dialog box displays. Configure the applicable properties and click Add.
|
|
3.
|
After an Action Type is selected, click Add. The workflow window displays and shows the newly added element. The Property Name is shown in the shape (for example, No Action). |
|
4.
|
To end the workflow after all Action Types are created, do the following: |
|
a.
|
Hover over the last Action Type element created. |
|
b.
|
Click the right-pointing arrow. |
|
c.
|
In the Select next Block dialog box, click Connect to End, then click Add. |
The workflow is completed.