Managing request views
You can adjust how requests are displayed using sorting and pagination controls.
Sorting table columns
Sorting helps you organize requests by request type, key, or creation time.
Sortable columns:
-
Key - Sort by request identifier (for example, NS-571, NS-570).
-
Ascending: Lowest to highest key number.
-
Descending: Highest to lowest key number.
-
-
Created At - Sort by creation date and time.
-
Ascending: Oldest requests first.
-
Descending: Newest requests first.
-
Sort the request table
-
Identify sortable columns by looking for up/down arrow indicators.
-
Click a sortable column header (for example, Key, or Created At).
-
Review the table as it sorts in ascending order.
-
Click the same column header again to switch to descending order.
-
To sort by a different column, click that column header.
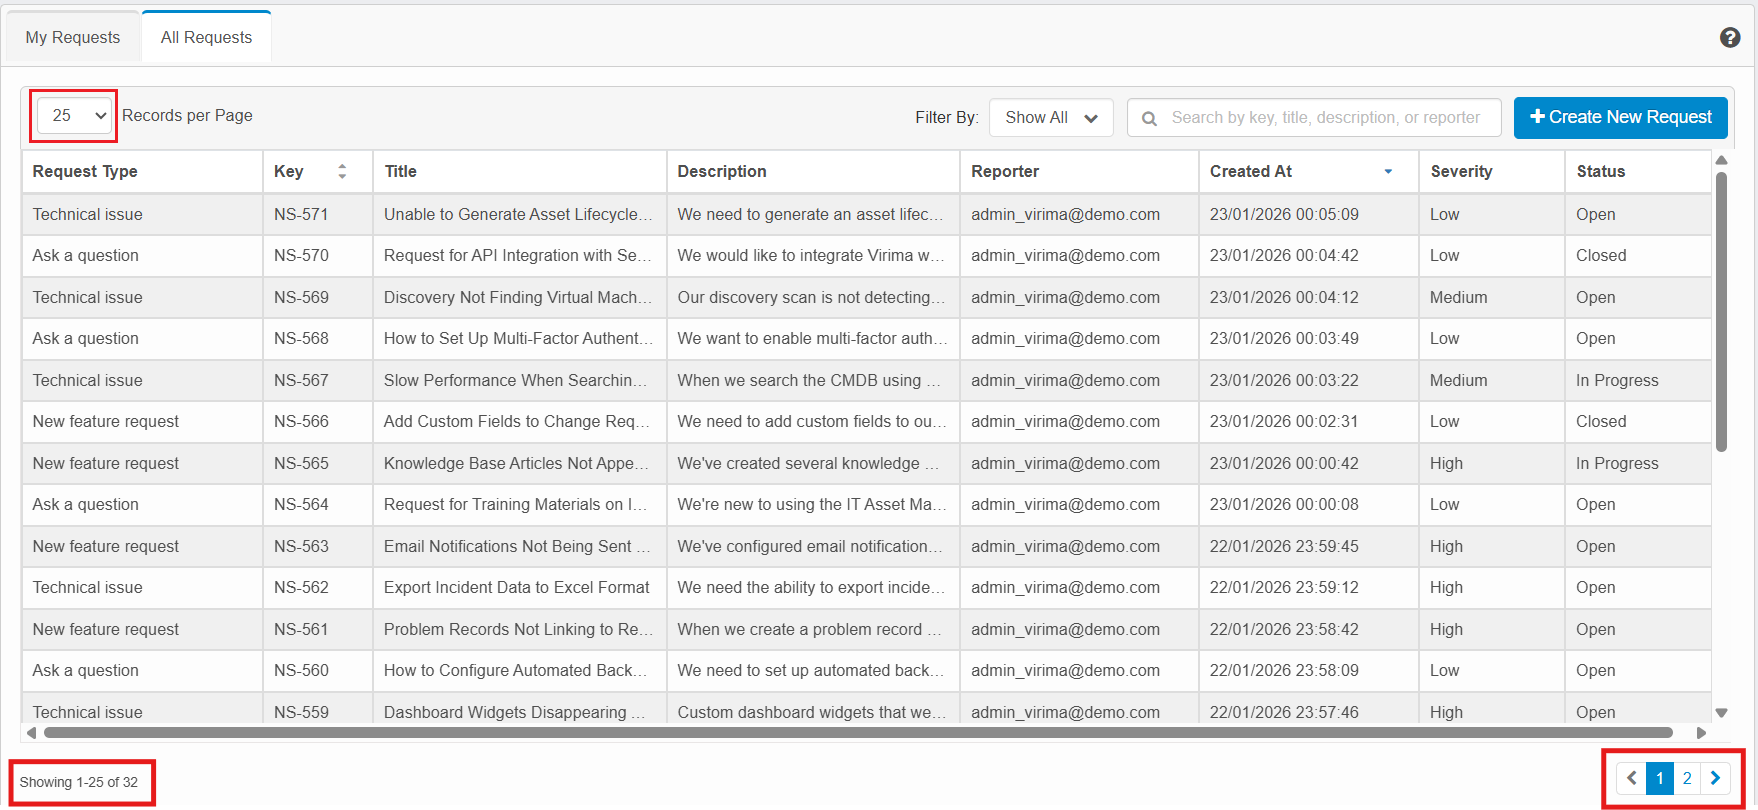
Pagination
Pagination controls allow you to navigate large numbers of requests efficiently.
Pagination components
-
Use the Records per Page dropdown (25, 50, 75, 100) to control how many requests are displayed on each page.
-
Displays the current page size (for example, 25).
-
Options: 25, 50, 75, 100.
-
Default: 25 records per page.
-
-
When you create large numbers of requests, the Support page automatically adjusts the pagination controls to keep navigation usable.
-
Locate the pagination controls at the bottom-right of the request table.
-
If the total number of pages is small (up to 5 pages), all page numbers are displayed (for example: < 1 2 3 4 5 >).
-
If the total number of pages exceeds 5, the support screen shows the first few pages, followed by an ellipsis (…) and the last page number (for example: < 1 2 3 4 5 …195 >).
-
In the text box next to Go to Page, type the page number you want to open. Click Go to Page or press Enter key to view the records available on the specified page number.
-
Uses the format Showing X–Y of Z.
-
Navigate between pages
Use arrow buttons
-
Click the left arrow (<) to go to the previous page (disabled on the first page).
-
Click the right arrow (>) to go to the next page (disabled on the last page).
Use page numbers
-
Click the required page number to view the required records. Use page numbers and arrows for nearby navigation. When the ellipsis (…) is displayed, use Go to Page text box to jump directly to distant pages.
-
The table refreshes to show requests for the selected page.
Change records per page
-
Locate the Records per Page dropdown in the control bar above the table.
-
Click the dropdown and select a value such as 25, 50, 75, or 100.
-
Based on the selection, you can observe the table adjusts and displays the required number of records on the page.
Requests Management
Follow these instructions when creating the request:
-
Use a clear, concise Title that summarizes the issue.
-
Add a detailed Description, including steps to reproduce, expected behavior, and actual behavior.
-
Set Severity accurately (Low, Medium, High, and Blocker) based on business impact, not just urgency.
-
Set the applicable Request Type.
-
Attach supporting evidence (screenshots, logs, configuration files) where relevant.
Monitor lifecycle progress
-
Use the Status column to track where each request is in its lifecycle:
-
Open – The request has been created and is awaiting initial action or assignment.
-
Triage – The request is under initial review and analysis to determine its priority, assignment, and appropriate solution approach.
-
New Requirement – Ticket represents a new feature or enhancement request.
-
In Progress – Active work has started on the request.
-
Pending – The request is on hold, waiting for information, approval, or another dependency.
-
Done – The request work is complete and all deliverables have been finalized.
-
Reopened – The request was previously closed but has been reopened due to new information or unresolved issues.
-
Duplicate – Ticket is a duplicate of another existing ticket.
-
-
Regularly review Pending requests to provide any requested information so work can resume.
Attach only relevant, readable files
-
Prefer logs or screenshots that clearly show the issue.
-
Avoid very large or unnecessary files that do not directly help diagnose the problem.
-
Ensure any sensitive data is removed or masked before uploading attachments.
Status transitions
The following examples describe the typical status transitions for each Request Type. Actual transitions may vary based on configuration and workflow rules.
Ask a question
-
Quick resolution: Open > In Progress > Done
-
Reopened after Done: Open > In Progress > Done > Reopened > In Progress > Done
-
Duplicate request: Open > Duplicate
New feature request
-
Quick resolution: Open > Triage > New Requirement > In Progress > Done
-
Reopened after Done: Open > In Progress > Done > Reopened > In Progress > Done
-
Duplicate request: Open > Duplicate
Technical issue
-
Quick resolution: Open > Triage > In Progress > Done
-
Reopened after Done: Open > In Progress > Done > Reopened > In Progress > Done
-
Duplicate request: Open > Duplicate