Projects
Use this function to create a project, which is the first step in Project Management process. A project can be created manually (by selecting a project template) or importing a project file.
| To create/edit projects, users must have appropriate role access. |
In the navigation pane, select Program and Project Management > Projects. The Projects window displays.

![]()
| 1. | From the Select Actions drop-down list, choose New Project. The Add Project dialog box displays |
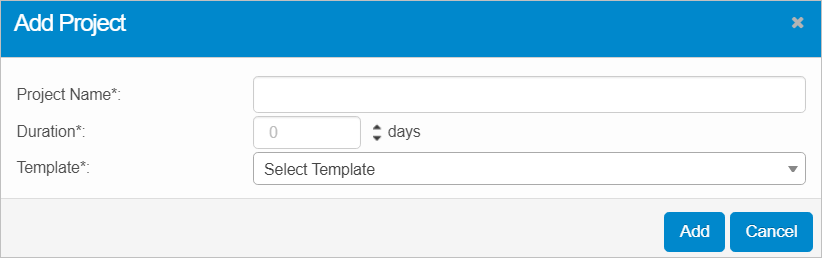
| 2. | Enter a Project Name and the Duration for the project in Days. |
| 3. | In the Template field, click the drop-down list and select the applicable template. |
| 4. | When all selections/entries are made, click Add. A window opens containing the selected Project Template. When created, the ID (assigned by the system) and the Name entered are displayed. Also, as this is an existing template, some field information may be populated, such as dates. |
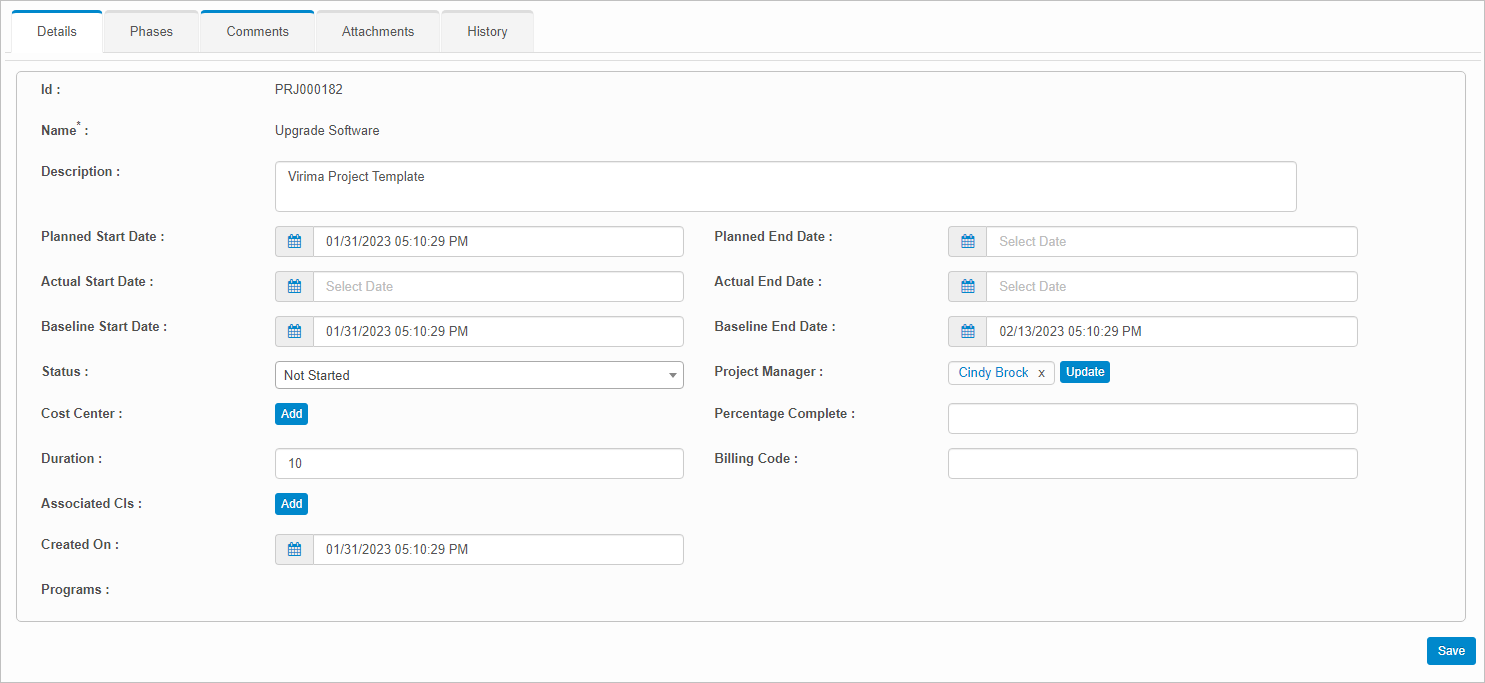
| 5. | Complete the fields, referring to the table below. |
| 6. | When all selections/entries are made, click Save. |
Project Template Fields
| Field | Description | ||
|---|---|---|---|
| Description | Description of the project. | ||
| Planned Start Date |
Defaults to the date the project was created; however, it can be changed to a past/future date. |
||
| Planned End Date |
Specifies the date when the last phase is to be completed. The date can be changed to a past/future date. |
||
| Baseline Planned Start Date |
Defaults to the date the project was created; however, it can be changed to a past/future date. | ||
| Baseline Planned End Date |
Defaults to the date based on the duration set in the project template; however, it can be changed to a past/future date. | ||
| Actual Start Date | This field is not editable. It is set to the date and time when the project status is changed to Active. | ||
| Actual End Date | This field is not editable. It is set to the date and time when the project status is changed to Complete. | ||
| Status |
Indicates the current stage of the project. A project status can be interchanged at any point of time before it is set to Completed. The statuses are: Not Started: It is the default stage of the project. Active: When status is set to active, the actual start date is set and the first phase of the project is be changed to Active automatically. Suspended: Selected when we need to suspend the project due to certain reasons.
Completed: This is the final stage of the project. A project is set to be complete when all its phases and tasks are completed. Note: A notification email is sent to the project manager(s) associated with the project for every status change. |
||
| Project Manager | Role of the User responsible for the project. Click |
||
|
Cost Center |
Cost center for this project. Used for accounting purposes. |
||
|
Percentage Complete |
Numeric value for the percent of the project that's complete. |
||
|
Duration |
Number of days that the project will take. |
||
|
Billing Code |
Code to assign to this project. Used for accounting purposes. |
||
| Associated CI's | CI’s associated with the project. Click |
||
|
Created on |
The date on which the project was created. Either type the date or select if from the calendar. |
||
| Programs | An associated program, if any. |
| 1. | While viewing the Details window, click the Phases Tab. |
| 2. | To add a new Phase, from the Select Actions drop-down list, choose Add Phase. Refer to Project Template: Phase Information Fields. |
| 3. | To add a new Task, move to a line item containing the applicable phase, and click the plus + sign. Refer to Project Template: Task Information Fields. |
| 4. | When all selections/entries are made, click Save. |
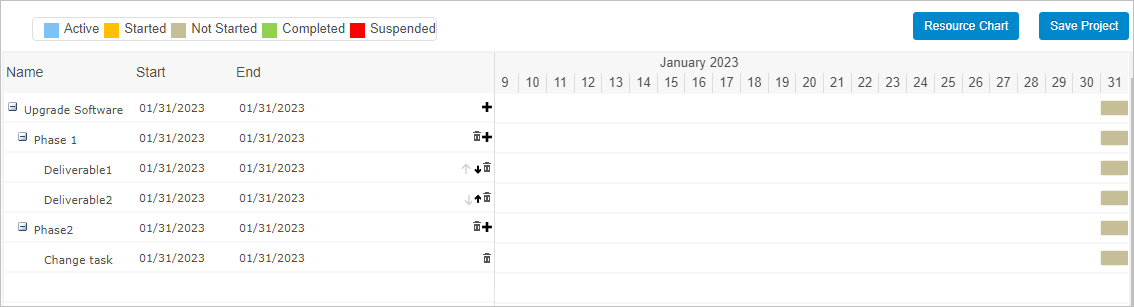
Use this option to display a visual representation of a project timeline that shows start and end dates of phases and tasks. Use this chart to add/delete a phase/task, change phases/task dates, and assess the progress of overall project.
To view the chart, do the following:
| 1. | If not already displayed, click the Phases tab. |
| 2. | Move to the right side of the window. |
| 3. | Click the left-facing arrow. |
A window slides open and the Project Chart is displayed. It includes the status of each phase/task.
In this window, the icons provide the following functionality:
v6 IMAGE - NOT WORKING on 2/1
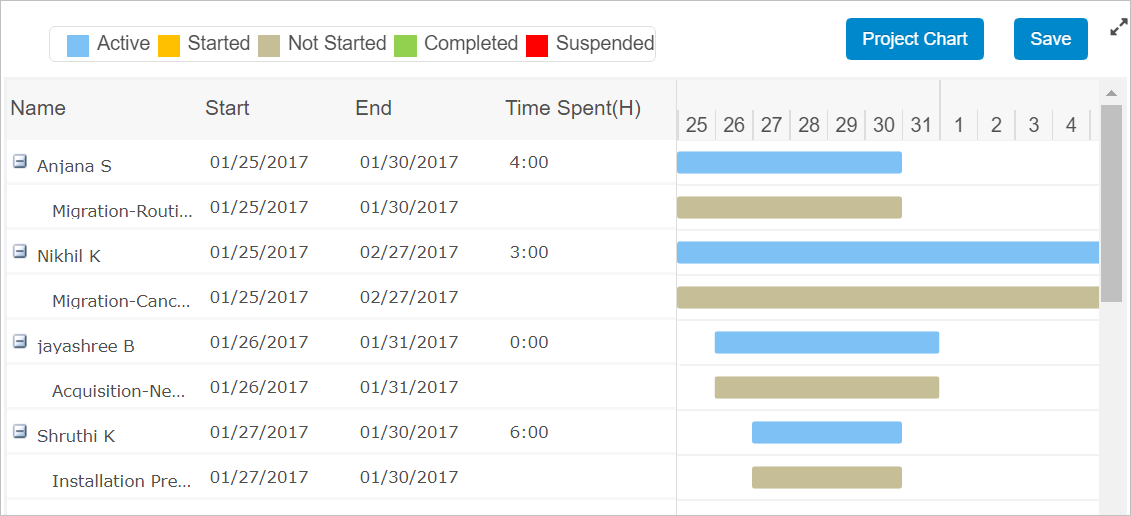
Use this function to display all the users assigned to tasks along with Start Date, End Date, and Time Spent.
To view the chart, do the following:
| 1. | If not already selected, click the Phases tab. |
| 2. | Move to the right side of the window. |
| 3. | Click the left-facing arrow. |
| 4. | Click the Resource Chart button. |
v6 IMAGE - NOT WORKING on 2/1
The list of Assignees is displays in alphabetical order.
The blue bar corresponding to the assignee is the sum of all the tasks (Start date of the earlier task + End date of the latest task).
| 1. | In the navigation pane, select Program and Project Management > Projects. The Projects window displays. |

| 2. | From the Select Actions drop-down list, choose Import Project. The Import Project File dialog box displays |
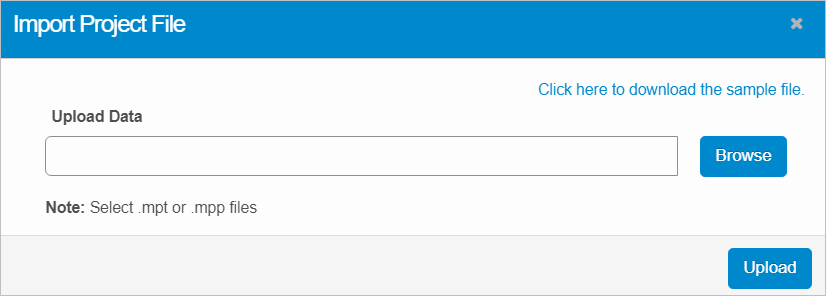
| 3. | Click the Browse button, then search for and select the applicable project file to import. |
| 4. | Use Click here to download the sample file to view what a file should look like. |
| 5. | Click Upload. |
| Not all functions include an option to edit record line items shown in the main window. |
| 1. | Navigate to the window containing the record to edit. |
| 2. | Click the line containing the record. The applicable window or dialog box displays. |
| 3. | Make the necessary modifications. |
| 4. | Click Save or Add, as applicable. |
When editing an existing item, other options may be available, such as adding Tasks, Comments, and Attachments and viewing History.
| The options change based upon the function; therefore, not every option may be shown. |
| Deleting is a permanent action and cannot be undone. Deleting may affect other functionality and information in the application such as data in configured reports, fields in windows, selectable options, etc. Therefore, be sure to understand the potential effects before making a deletion. |
| 1. | Click the line that contains the item to delete. |
| 2. | From the Select Actions drop-down list, choose Delete. If a confirmation message is displayed, type Delete and click Deleteto confirm. |
Other Functions and Page Elements