Scheduling a Network Scan
-
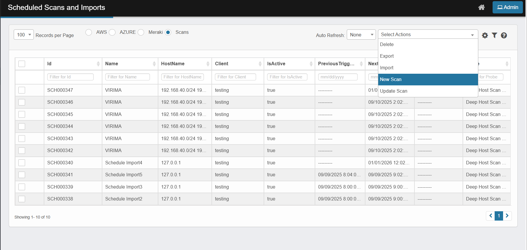
In Scheduling Scans and Imports landing page
-
Select "Scans" Radio Button
-
From the "Select Actions" drop down
-
Select Option "New Scan"
-
The Run A Scan page opens.

-
Enter Required Details:
-
Name* – Enter the display name. This is a name to identify the schedule scan
-
Probe* – choose the scan probe (e.g., Deep Host Scan (WMIC | SSH | SNMP)).
-
Client* – Select the Discovery Application that has access to the IP Range / hostname to be scanned
-
Scan Through – choose IP Address or Host Name.
-
IP Range* – enter targets. Supported formats:
-
Single IP: 192.168.48.1
-
Multiple across subnets (space-separated): 192.168.48.1 192.168.49.2
-
Same-subnet list: 192.168.48.1,2,3,4
-
Range: 192.168.48.1-50
-
CIDR (one or more): 192.168.48.0/24 192.168.49.0/24
-
-
Exclude IP Range – Enter IP address that has to be excluded from the scan. The format is the same IP Range
-
For Hostname based scans enter comma separated hostnames
-
Location
-
Click Add to select the Location the discovered devices will be associated with
-
-
Send Scan Report To
-
Click Add → pick one or more users from the Virima User directory.
-
Recipients get email when the scan report is generated. (Make sure their email + role are set in Users.)
-
-
Timezone
-
Choose the time zone where you want the schedule to be interpreted.
Tip: If times look off, confirm this first.
-
-
Scan Frequency
-
Leave Current Time Settings to drive the schedule entirely from the wheels, or—if your environment exposes presets—choose a preset here.
-
-
Active / Recurring
-
Active: must be ON for the job to run.
-
Recurring:
-
On → runs indefinitely by your wheels; turns on Yearly occurrence
-
Off → Execute at scheduled times only for current year
-
-
-
Time wheels (what actually sets the schedule)
-
Tick a unit to include it, then select values:
-
Second – default 0 if not changed (start at top of the minute).
-
Minute, Hour, Day, Month, Weekday – choose one or multiple values per column.
-
-
The combination you pick becomes the schedule.
-
-
Certificate Required when “Certificate Scan” Probe is selected. Attach a file path/certificate/location artifact needed by the probe. Click Add to supply/update the path.
-
Port Range: Required when “Port Scan” Probe is selected
-
URL Required when “Website Discovery” Probe is selected
-
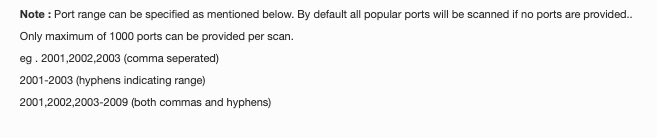
Port list rules
-
Port range can be specified as mentioned below, by default all popular ports will be scanned if no ports are provided.
-
Only maximum of 1000 ports can be specified per scan.
-
Accepted formats:
-
Comma-separated list: 2001,2002,2003
-
Range with a hyphen: 2001-2003
-
Mixed list and range: 2001,2002,2003-2009
-
-
Click Save.
-
Confirm the Schedule
-
You’ll be redirected to Scheduled Scans and Imports → Scans.
-
Your newly created job will be listed with IsActive = true and a NextTriggerTime displayed, confirming that the schedule is active and set.
