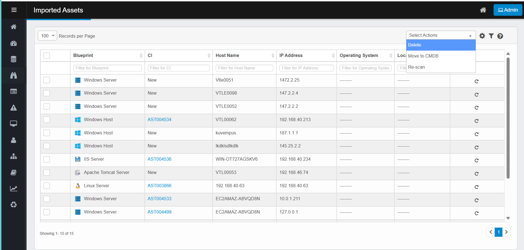
Managing Imported Assets
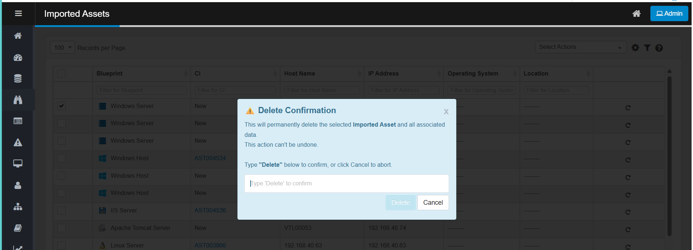
Delete Imported Assets
This action permanently removes the selected asset record(s) from the Imported Assets list, ensuring that outdated or incorrect entries do not clutter the system.
-
Select the checkbox next to one or more asset records.
-
From the Select Actions dropdown, choose Delete.
-
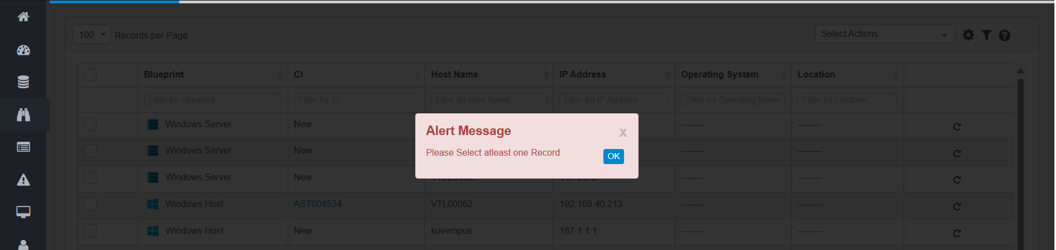
If no record is selected, an alert message appears: "Please Select atleast one Record."
-
Type Delete, and then click on Delete to confirm.
-
Click Cancel to cancel the deletion.
-
The selected records are removed from the Imported Assets list.
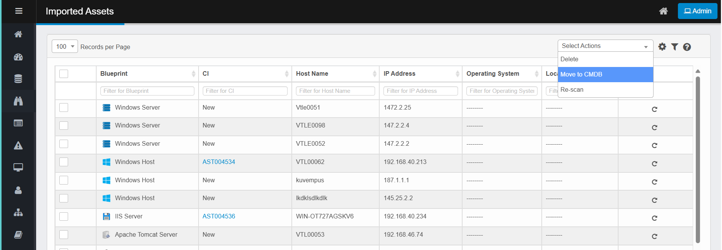
Move Assets to CMDB
The "Move to CMDB" option in Virima allows users to move selected asset records from the Imported Assets list into the CMDB. This process ensures that only validated and relevant assets are formally tracked and managed as configuration items (CIs).
-
Select the checkbox next to one or more asset records in the Imported Assets list.
-
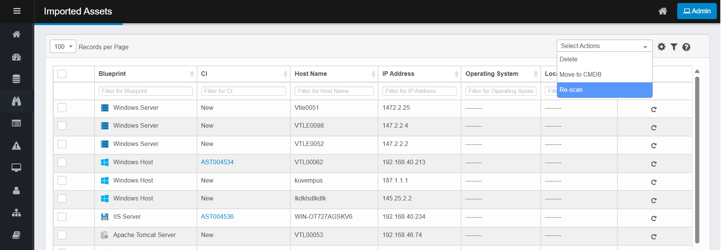
From the Select Actions dropdown, choose Move to CMDB.
-
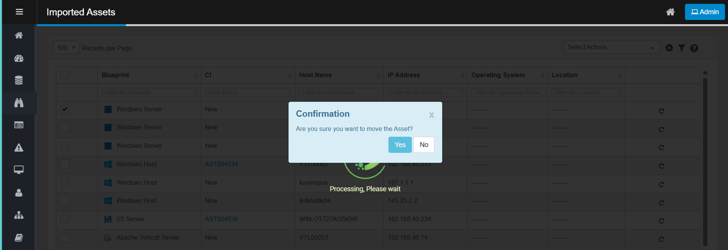
A confirmation dialog appears: “Are you sure you want to move the Asset?”
-
Click Yes to proceed.
-
The system begins processing and moves the selected records into the CMDB.
-
-
Click No to cancel the operation.
-
Wait until the record is moved; the selected record will appear grayed out during processing.
-
After moving, records cannot be retrieved from the Imported Assets list.
-
You can also move assets to the CMDB from the Details window.
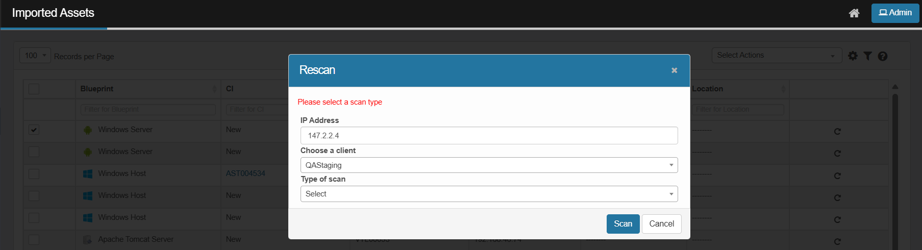
Re-scan Assets
The Re-Scan feature enables users to restart the scanning process for an existing asset record. This is helpful when an asset's information has changed or was incomplete during the initial scan.
-
Select the checkbox next to the asset record you want to revalidate in the Imported Assets list.
-
From the Select Actions dropdown, choose Re-scan.
-
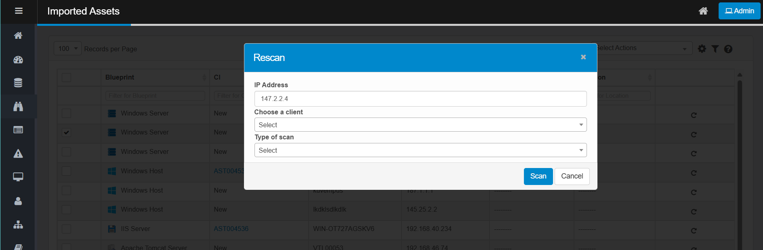
The Re-scan window opens.
-
Enter or select the following details:
-
IP Address: The asset’s IP address (auto-filled but editable).
-
Client: Select the client from the dropdown.
-
Type of Scan: Select the scan type probe from the dropdown (e.g., Deep Host Scan, vCenter Scan).
-
-
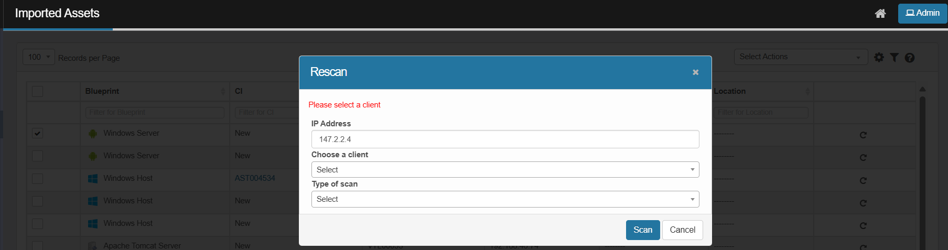
If the user does not select a client and attempts to perform the scan operation, the system displays the error message: “Please select the client.”
-
If the user selects a client but does not select a scan type and attempts to perform the scan operation, the system displays the error message: “Please select a scan type.”
-
Click Scan to initiate the re-scan.
-
The system refreshes the asset’s data and updates the table accordingly.
-
A new scan run will appear on the Recent Scans page; refresh the page to view the latest status updates.
-
-
Click Cancel to cancel without making changes.
The asset must have a valid IP address to be re-scanned.