Move Items to the CMDB
-
In the All, Authorized, or Unauthorized tab, select one or more rows.
-
Click Move to CMDB.
-
In the confirmation dialog, click Continue. The move runs in the background. Use Auto Refresh to monitor progress.
-
Upon a successful move, records are removed from the Import from Juniper Mist and Discovered Items views and appear in the CMDB.
Note: If no rows are selected, all records matching the current filters are moved. Select specific rows to limit scope.
Each record is first checked against existing CIs. A match updates the existing CI, and no match creates a new one. Records that cannot be correlated are logged as skipped rather than inserted blindly.
Viewing Moved Records
After the records are moved to the CMDB, the imported Juniper Mist Site, Access Point, Switch, and Security Appliance resources are available as configuration items (CIs).
Select any CI to open its details. The available tabs display information specific to the CI's blueprint. For example, a Switch CI includes a Wired Client tab that displays the hosts connected to the switch.
For more information about viewing and editing configuration items, see View and Edit a CI.
Creating Relationships
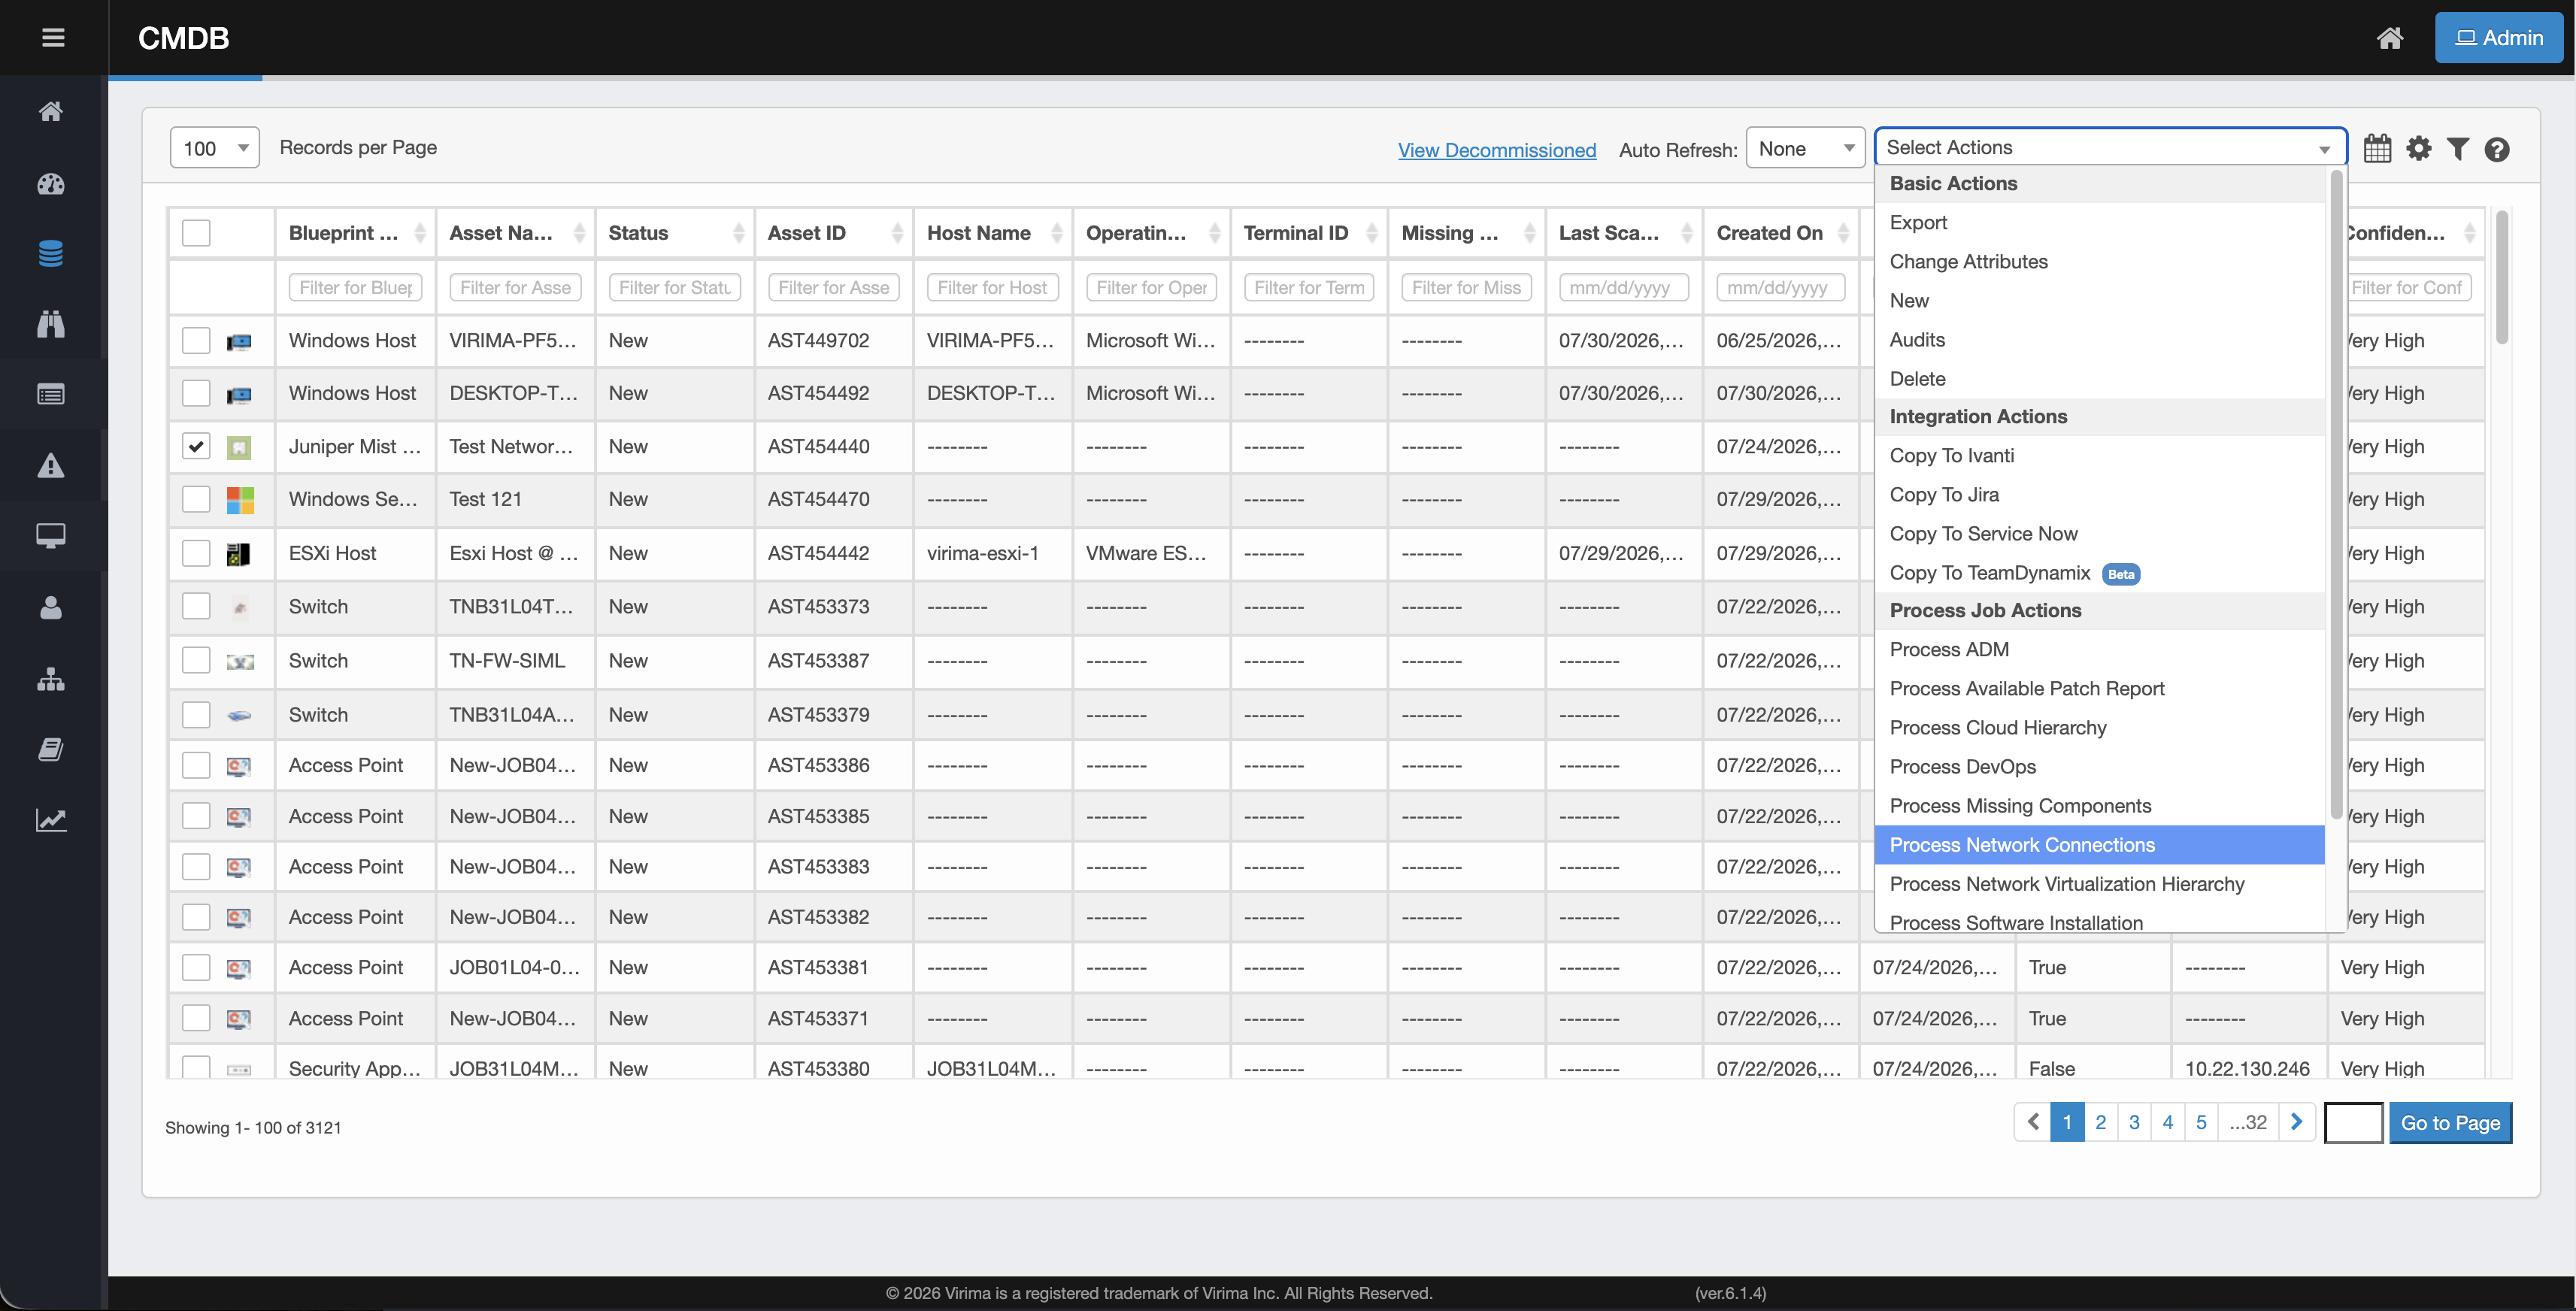
Moving Juniper Mist records to the CMDB does not by itself create relationships between the CIs. Once the records exist in the CMDB, select the checkbox for the record and choose the appropriate option from the Select Actions dropdown at the top of the CMDB grid, under Process Job Actions:
-
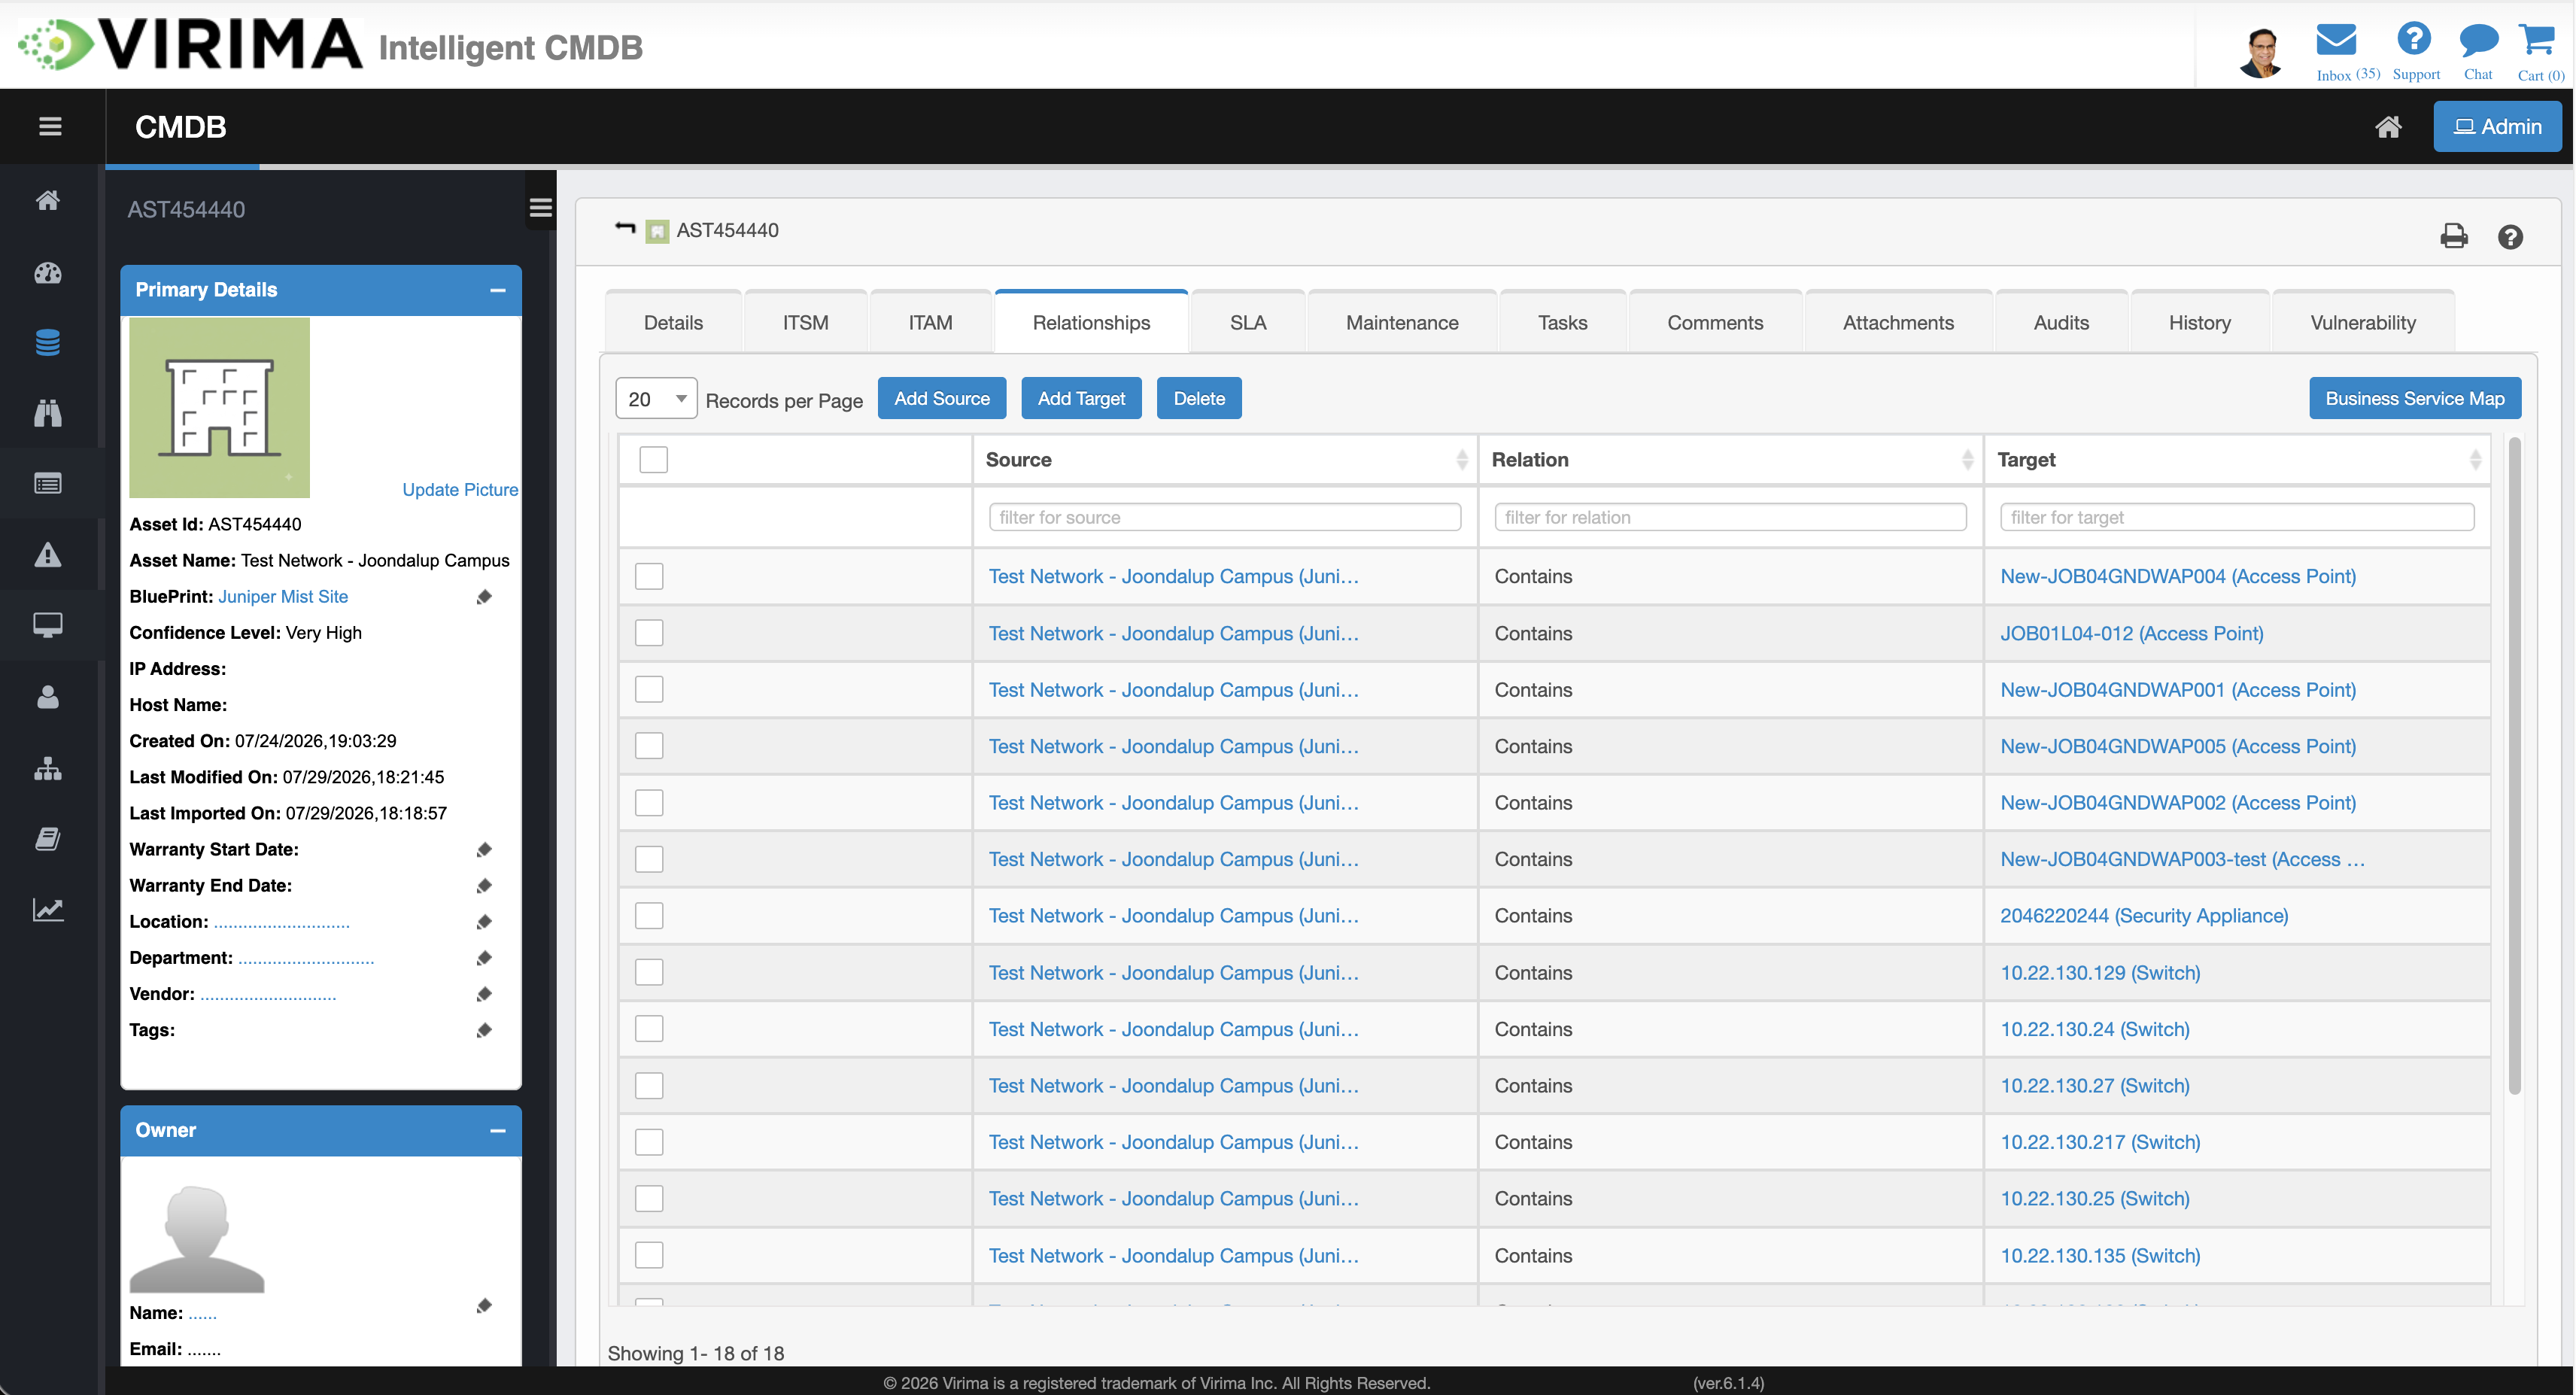
Process Cloud Hierarchy: From the CMDB Select Action menu, run Process Cloud Hierarchy to create CONTAINS relationships between imported Juniper Mist devices and their associated Juniper Mist Site CIs. The process locates every Access Point, Switch, and Security Appliance CI imported from Juniper Mist, uses each device's stored parent Site ID to identify the corresponding Juniper Mist Site CI, and creates a CONTAINS relationship with the Juniper Mist Site as the source and the device as the target (Site CONTAINS Device). After the hierarchy is processed successfully, Virima displays the message "Process Cloud Hierarchy added successfully."
-
Process Network Connections: From the CMDB Select Action menu, run Process Network Connections to create CONNECTED TO relationships based on the available network connection data. Wired client details for switches remain available in the switch's Wired Client tab and are used to display the hosts connected to that switch. After the process completes successfully, Virima displays the message "Process Network Connections added successfully."
Both actions are idempotent. Re-running them does not create duplicate relationships.
To view the relationships created by these actions, open the Juniper Mist Site record's Relationships tab, or click Business Service Map to see them visually.