Scheduled AD Import
After AD configuration, follow these steps:
-
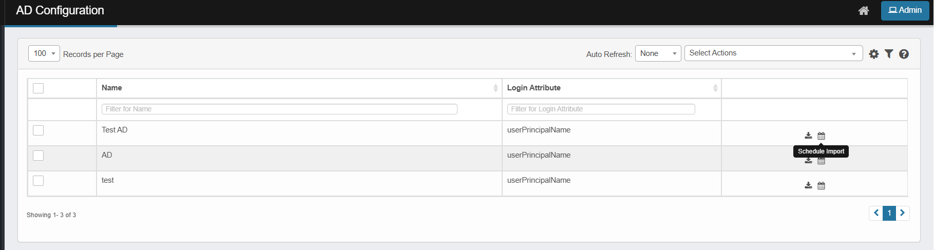
Click the Schedule Import icon to the right of the selected line item.
-
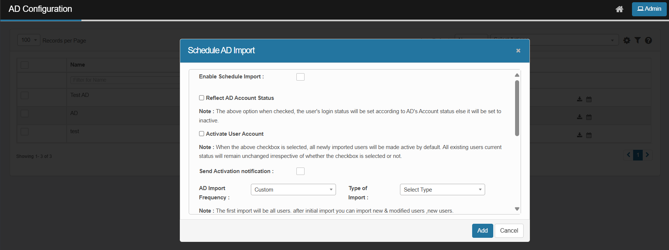
The Schedule AD Import dialog box displays.
-
Select Enable Schedule Import to turn on the import function.
-
Select Activate User Account to activate all users.
-
Select Send Activation notification to the applicable users when the import is complete.
-
Reflect AD Account Status – Enable to match user login status with Azure AD.
-
Activate User Account – Enable to make imported users active by default.
-
Send Activation Notification – Enable to email users upon account activation.
-
In the AD Import Frequency field, click the drop-down list and select the applicable import frequency, such as Every Day, Every 2 days, and so forth.
-
In the Type of Import field, click the drop-down list and select the type of import, such as All Users, New & Modified Users and New Users
-
In the schedule area, select Timezone and the appropriate schedule timing.
-
When all selections/entries are made, click Add. (If you are editing the existing information, the Add button changes Update.)
-
After import completion, view import records in the AD User Import Logs.