SLA
To set up response and resolution times for any CI (Incident, Request, Change, or Problem) whose Root-Cause blueprint’s SLA should apply, follow these steps:
-
Open the SLA tab:
-
Click the desired Blueprint.
-
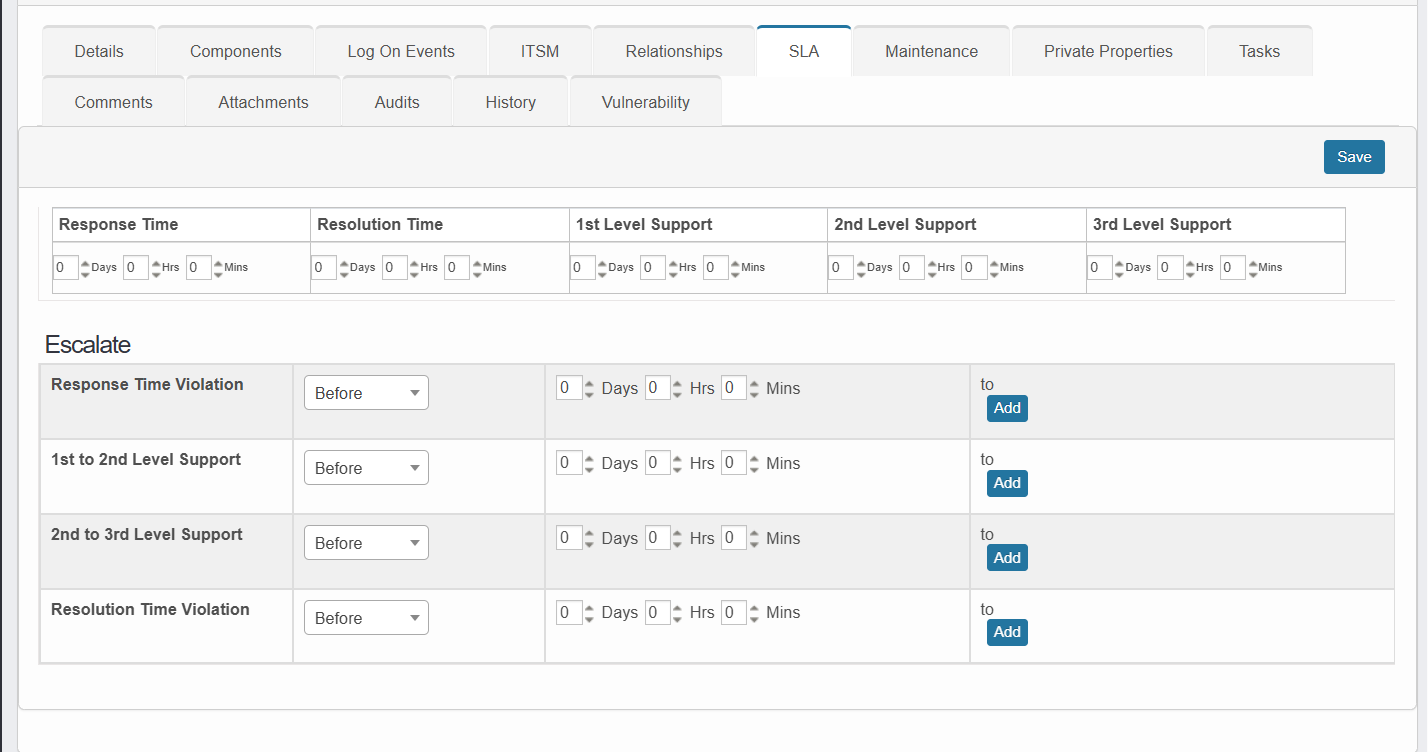
In the Details pane, switch to the SLA tab.
-
-
Set response and resolution targets:
-
Response Time: Enter the maximum time before the first response.
-
Resolution Time: Enter the total time allowed for full resolution. Note: This value must be at least the sum of your response time and any support-level response windows.
-
-
Define support-level response windows:
-
In the Support Level fields, specify the response time for each tier (1st, 2nd, 3rd, etc.).
-
-
Configure escalation rules:
-
First column: Choose whether the escalation fires before or after the specified delay.
-
Second column: Enter the delay amount (hours/minutes) before notifications are sent.
-
Third column: Click Add (for a new recipient list) or Update (to edit an existing one), then select users, roles, groups, or departments to alert.
-
For each rule, specify when it triggers, how long to wait, and who gets notified:
|
When |
Delay |
Notification Recipients |
|
Before/After X |
Time duration (e.g. 30 minutes) |
Users, roles, groups or departments (select one or many; use the Add/Update buttons to choose or modify recipients) |
-
Once all fields and escalation rules are set, click Save to apply.