Copy to TeamDynamix
The Copy to TeamDynamix action transfers Configuration Items (CIs) from Virima to TeamDynamix based on predefined mappings. The system retrieves records, validates them against mapping rules, maps the data to TeamDynamix attributes, and transfers them in the required sequence to maintain dependencies.
Button visibility note: The Copy to TeamDynamix button is hidden until the tenant is subscribed to the TeamDynamix module and valid credentials have been saved. If the button is not visible, return to Admin > Integrations > TeamDynamix Credentials and confirm the credentials are saved successfully.
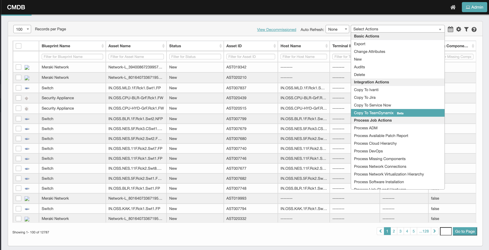
Copy CIs from the CMDB List
-
In Virima, navigate to the CMDB module.
-
(Optional) Filter the list by CI type (for example, Windows Host) to scope the selection.
-
Select the CIs you want to copy using the row checkboxes.
-
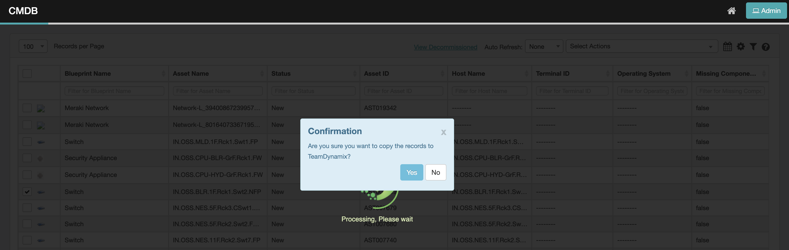
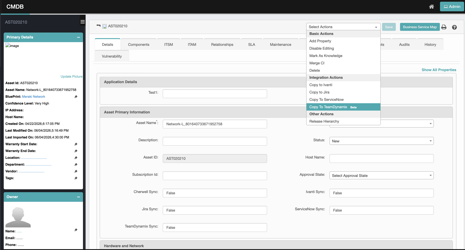
Click Copy to TeamDynamix from the Select Actions dropdown.
-
Click Yes to confirm.
-
The selected CIs are processed. For each CI, Virima looks up the corresponding TDX CI Type and applies the configured attribute mappings.
-
The selected CIs appear in the TeamDynamix Configuration Items view, marked with Virima as their source system.
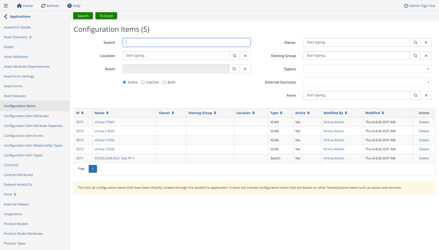
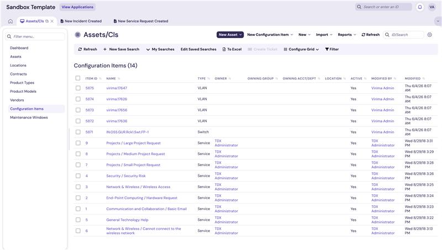
Validating Records in TeamDynamix
-
Log in to your TeamDynamix instance.
-
Open the relevant TeamDynamix Configuration Items view (for example, Windows Host).
-
Verify that the copied CI records are present in the list view.
TeamDynamix Admin portal view
TeamDynamix User portal view
Copy from CI Detail View
Administrators can also copy a single CI from its detail page:
-
Open any CI in Virima.
-
Click Copy to TeamDynamix from the Select Actions dropdown.
-
Confirm in the dialog.
-
The single CI is copied to TeamDynamix using the same mapping logic as the bulk action.
Monitor the Sync
Monitor progress and sync details from the Sync Logs page under Configuration Management. Select the TeamDynamix radio button to view TeamDynamix-specific sync entries. For details, see TeamDynamix Credentials.