Azure AD Configuration
Use this function to configure Azure Active Directory (Azure AD), which is a multi-tenant, cloud-based directory and identity management service. Azure AD combines core directory services, advanced identity governance, and application access management.
In the main window, click Admin > Users > Azure AD Configuration. The Azure AD Configuration window displays.


 New Azure AD Configuration
|
1.
|
From the Select Actions drop-down list, choose New Azure AD Configuration. |
|
2.
|
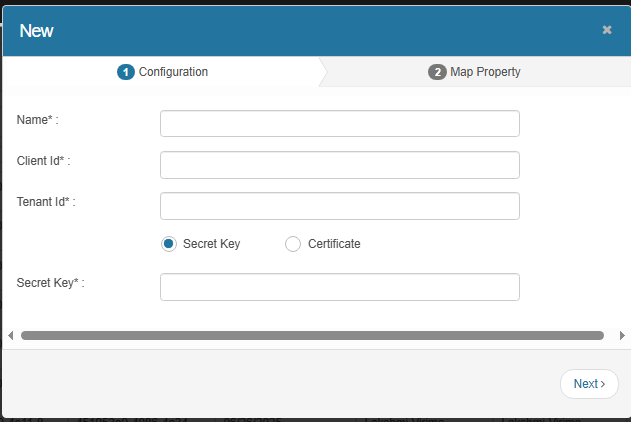
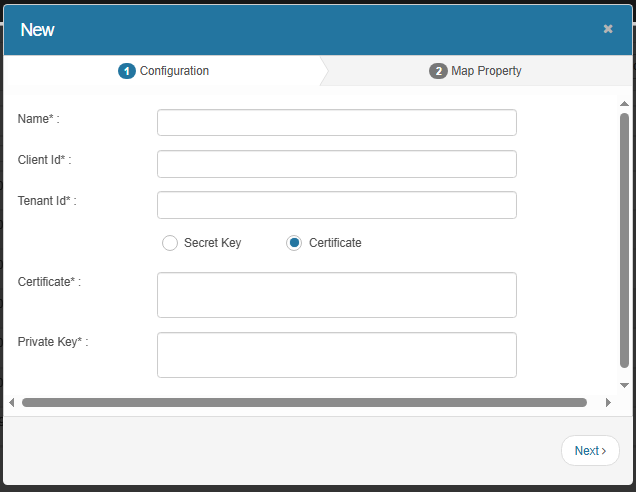
In the Configuration tab, enter the required details: |
Name – Provide a configuration name.
Client ID – Enter the Azure application client ID.
Tenant ID – Enter the Azure tenant ID.
Secret Key – Provide the authentication method (secret key).
Certificate – Provide the authentication method (certificate with private key).
|
4.
|
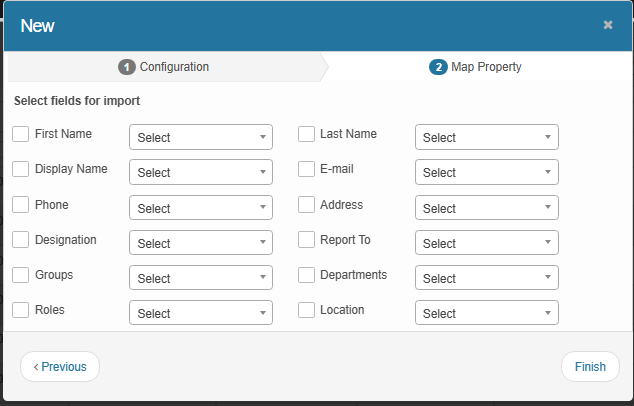
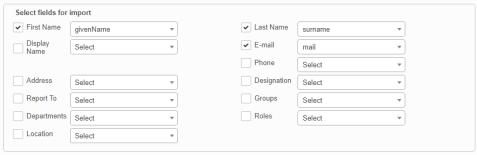
In the Map Property tab, select fields for import (for example: First Name, Last Name, Email, Phone, Roles, Groups). |
|
5.
|
For each field, choose the property mapping from the drop-down list. |
|
6.
|
When all selections/entries are made, click Finish. |
Import Users
| |
AZURE Web Services account credentials must be configured.
|
|
1.
|
In the Azure AD Configuration window, Click the Import Users icon (down arrow next to the applicable configuration). |
|
2.
|
In the Azure AD Import dialog box: |
Reflect AD Account Status – Enable to match user login status with Azure AD.
Activate User Account – Enable to make imported users active by default.
Send Activation Notification – Enable to email users upon account activation.
|
3.
|
Click Import to begin the process. |
Schedule Import
To schedule an import:
|
1.
|
In the Azure AD Configuration window, click the Schedule Import (calendar icon). the Schedule AD Import dialog box displays. |
|
2.
|
In the Schedule Azure AD Import dialog box, to turn on the schedule, click Enable Schedule Import. |
|
3.
|
Select Reflect AD Account Status to set the user's login status according to AD's account status; otherwise, it will be inactive. |
|
4.
|
Select Activate User Account to turn on the user's account after import. |
|
5.
|
To email a notification when the import is complete, click Send Activation Notification. |
|
6.
|
From the Azure AD Import Frequency drop-down list and select the applicable frequency. If necessary, modify the Every Day, Every 2 Days, Every Week, etc. |
| |
To clear the selection, click the AD Import Frequency drop-down list and make a different selection. |
|
7.
|
When all selections/entries are made, click Add. |
Property Mappings
|
1.
|
Select an existing record. The Details window displays. |
|
2.
|
Click Property Mappings. |
|
3.
|
Check the checkbox next to the properties to include in the import. |
|
4.
|
Click the drop-down below the property field and select the property to match from the imported file. |
|
5.
|
When all selections are made, click Save. |
Test Azure AD Configuration
Use this function to validate configured credentials. An error will be shown if, for example, the password was changed in Azure.
From the Select Actions drop-down list, choose Test Azure AD Configuration.
A message displays, indicating if the credential is valid or invalid.
Other Functions and Page Elements