Project Template
Generate the help and recheck this topic.
https://wiki.virima.com/wiki/doku.php?id=admin:projectmanagement:project_template&s[]=phase
Use this function to create a project template that defines the basic structure of a project.
| A project template can be created, edited, and deleted by all the Roles expect the end user. |
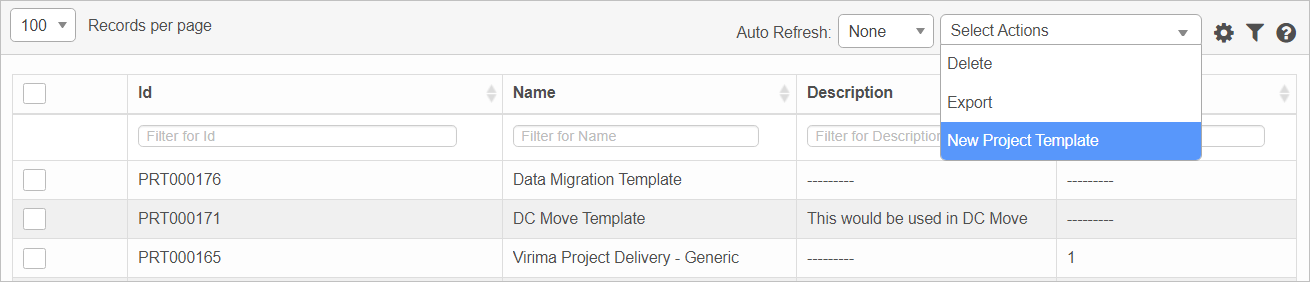
In the navigation pane, click Admin > Project Management > Project Template. The Project Template window displays.
![]()
| 1. | From the Select Actions drop-down list, choose New Project Template. The New Project Template window displays. |
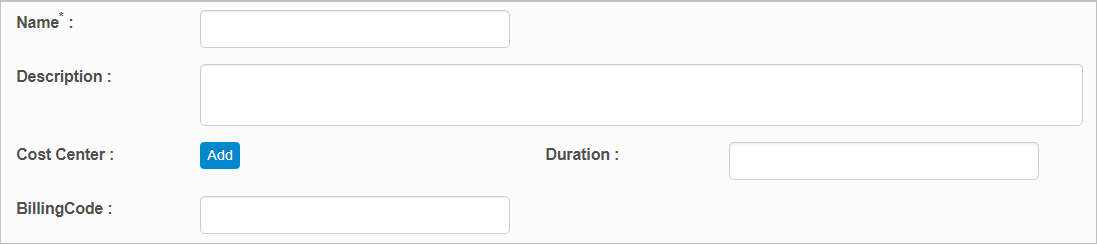
| 2. | Enter a Name and Description |
| 3. | In the Cost Center field, click |
| 4. | In the Duration field, enter the length of time this template is valid. |
| 5. | In the Billing Code field, enter the code associated with billing. |
| 6. | When all selections/entries are made, click Add. |
Once the template has been created, it must be edited to add more information. See Phases.
A project template always starts with a phase and then has associated tasks. A project can be associated with multiple phases and, in turn, a phase can have multiple tasks.
| 1. | In the Project Template window, select an existing template. |
| 2. | Click the Phases tab. |
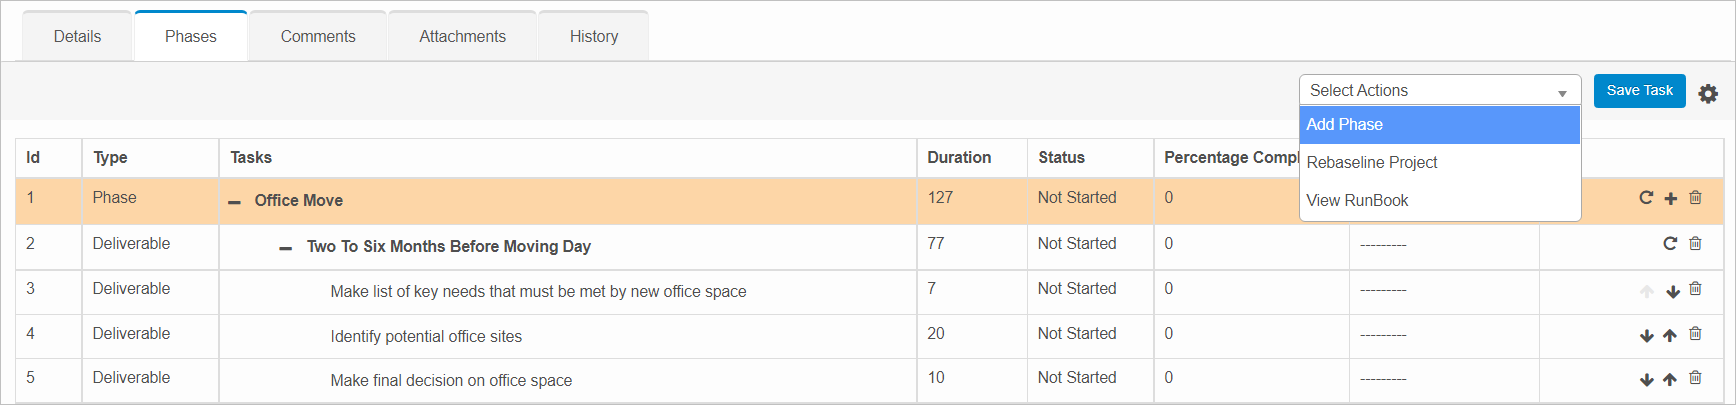
| 3. | From the Select Actions drop-down list, choose Add Phase. The Phase Information dialog box displays. |
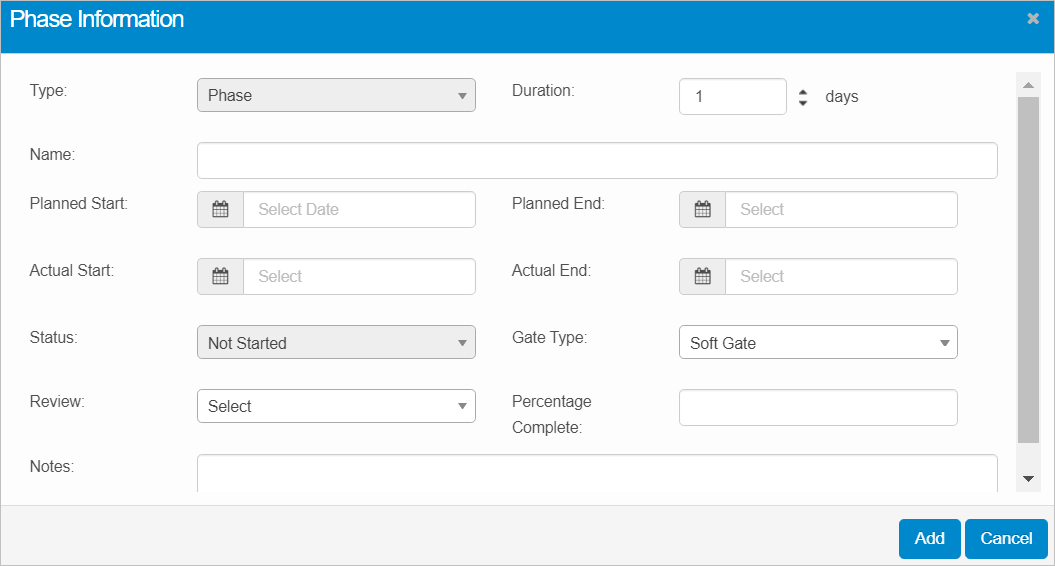
| 4. | Complete the fields, referring to the table below. |
| 5. | When all selections/entries are made, click Add. |
Phase Information Fields
| Field | Description | |||||||||
|---|---|---|---|---|---|---|---|---|---|---|
| Type | Specifies the phase name. | |||||||||
|
Duration |
Indicates the number of days by which the phase or task must be completed. Duration is based on the organization working days. |
|||||||||
| Name | The name for the task. | |||||||||
|
Planned Start |
For the first phase, the date will be set to value of the Project’s Planned Start. Subsequent Phases Planned Start will be computed based on the previous phase’s duration. In other words this date will be same as the previous phase’s Planned End date. |
|||||||||
|
Planned End |
Computed based on the latest due date of that phase or task deliverable/milestone. |
|||||||||
|
Actual Start |
This filed is set automatically when the State of a Phase is set to Started and also when the Project is set to Active. The State for the First phase is set to Started the moment the any of the deliverable/milestone task is completed. Once a date is set, there can be no further modifications made. |
|||||||||
|
Actual End |
This date is computed and set, when that phase’s task state is set to ‘Completed.’ Once this date is set, it cannot be changed. |
|||||||||
|
Status |
There are four statuses: Not started. Initial stage of a phase/task.
Started. It indicates that a phase/task is started and sets the actual start date of a phase/task.
Active. This status set the actual start date of a phase/task as well. The first phase of the project will be set to Active automatically, when the project status is changed to Active.
Completed. Indicates that the task is completed and it sets the actual end date.
|
|||||||||
|
Gate Type |
This is available only for Phase. There are two types of Gates:
Hard Gate. If a phase has a hard gate its successor phase cannot be started/made active without completing its top level phase. Hard Gate phases are shown in red.
Soft Gate. If a phase has a soft gate its successor phase can be made active/started irrespective of its top level phase |
|||||||||
|
Review |
This is available only for Phase. Go. This option will be available only when all the mandatory tasks of a phase are completed. Selecting this option marks the current phase as Completed and the succeeding phase status will be changed to Active automatically.
Suspended. A phase can be suspended at any status and that would in turn suspend the project.
|
|||||||||
|
Percentage Complete |
The percentage of completion for this phase. |
|||||||||
|
Notes |
Additional information about this phase. |
| A phase and its associated tasks (even if the tasks status is Not Started) cannot be Deleted/Edited once the phase is Completed or Suspended. An alert message displays if this is the case. |
| 1. | Locate the line item containing the phase to which a task will be added. |
| 2. | Click the plus + sign on the right-hand side of the row. The Task Information window displays. |
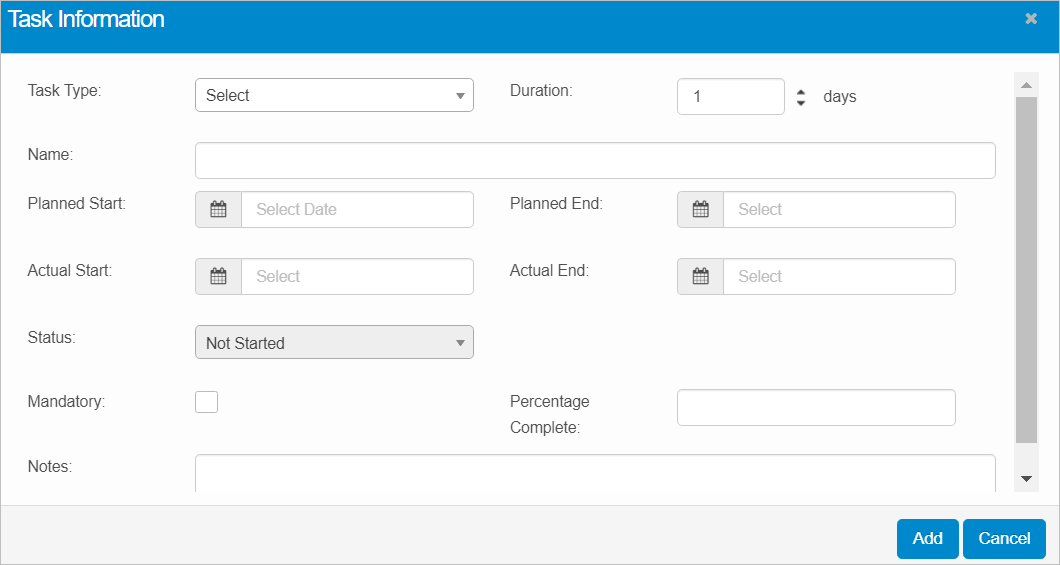
| 3. | Complete the fields, referring the table below. |
| 4. | When all selections/entries are made, click Add. |
Task Information Fields
| Field | Description | |||||||||
|---|---|---|---|---|---|---|---|---|---|---|
| Type |
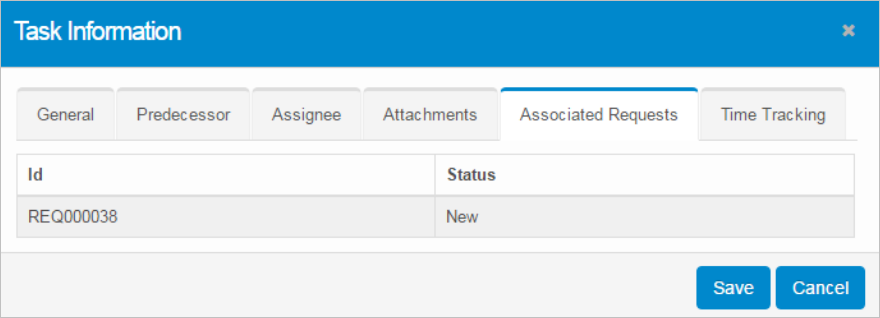
Specifies the task type. Task Type is available only for Task and indicates the type of a task. Click the drop-down list and select the relevant type: Milestone, Deliverable, Change Task, Request Task and Release Task. For tasks types Change, Request, and Release, respective records can be created when a task is created. Click the link to associate the Change, Request, or Release. Deliverable/Milestone is the final stage of a task.
|
|||||||||
|
Duration |
Indicates the number of days by which the task must be completed. Duration is based on the organization working days. |
|||||||||
| Name | The name for the task. | |||||||||
|
Planned Start |
The date on which the task will begin. |
|||||||||
|
Planned End |
Computed based on the latest due date of that task deliverable/milestone. |
|||||||||
|
Actual Start |
This filed is set automatically when the state is set to Started and also when the Project is set to Active.
|
|||||||||
|
Actual End |
This date is computed and set, when the task's state is set to ‘Completed.’
|
|||||||||
|
Status |
There are four statuses: Not started. Initial stage of a phase/task.
Started. It indicates that a phase/task is started and sets the actual start date of a phase/task.
Active. This status set the actual start date of a phase/task as well. The first phase of the project will be set to Active automatically, when the project status is changed to Active.
Completed. Indicates that the task is completed and it sets the actual end date.
|
|||||||||
|
Mandatory |
Specifies this task must be completed. |
|||||||||
|
Percentage Complete |
Indicates the percentage of the task completed. This value must be manually entered. |
|||||||||
|
Notes |
Additional information about this task. |
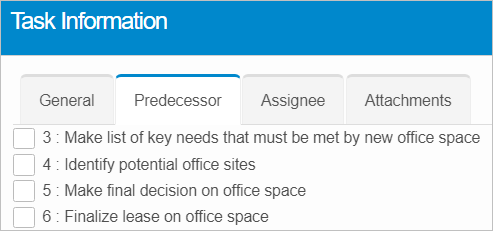
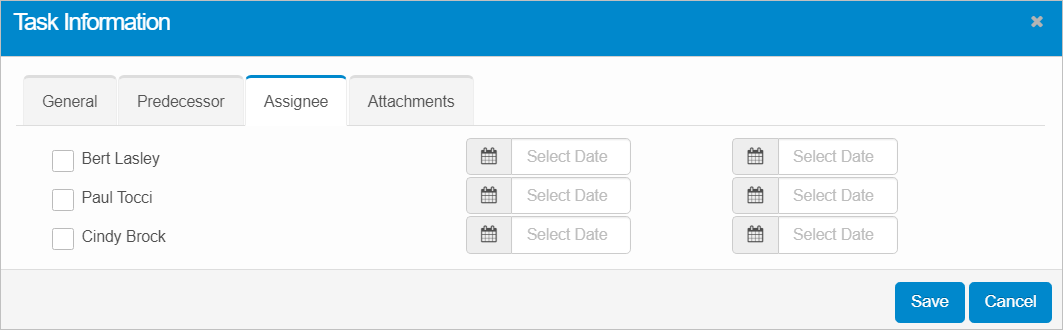
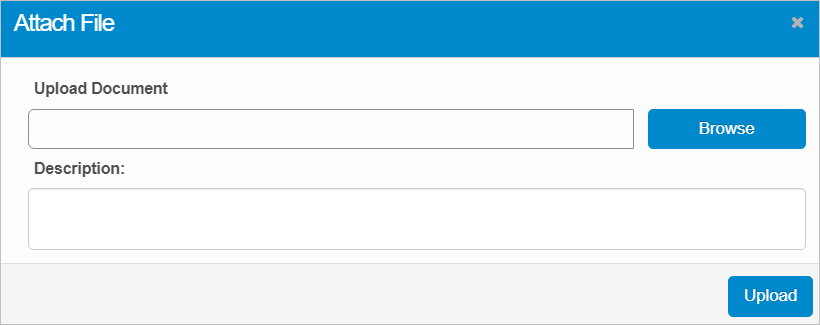
| The tabs change based upon the Task Type. |

The Select Actions drop-down list includes these options:
| Not all functions include an option to edit record line items shown in the main window. |
| 1. | Navigate to the window containing the record to edit. |
| 2. | Click the line containing the record. The applicable window or dialog box displays. |
| 3. | Make the necessary modifications. |
| 4. | Click Save or Add, as applicable. |
When editing an existing item, other options may be available, such as adding Tasks, Comments, and Attachments and viewing History.
| The options change based upon the function; therefore, not every option may be shown. |
| Deleting is a permanent action and cannot be undone. Deleting may affect other functionality and information in the application such as data in configured reports, fields in windows, selectable options, etc. Therefore, be sure to understand the potential effects before making a deletion. |
| 1. | Click the line that contains the item to delete. |
| 2. | From the Select Actions drop-down list, choose Delete. If a confirmation message is displayed, type Delete and click Deleteto confirm. |
Other Functions and Page Elements