Procurement Properties
Use this function to configure the properties for Procurement.
In the navigation pane, select Admin > Procurement > Procurement Properties. The Procurement Properties window displays.


 New Procurement Properties
|
1.
|
From the Select Actions drop-down list, choose New Procurement Property. The Add Procurement Properties window displays. |
|
2.
|
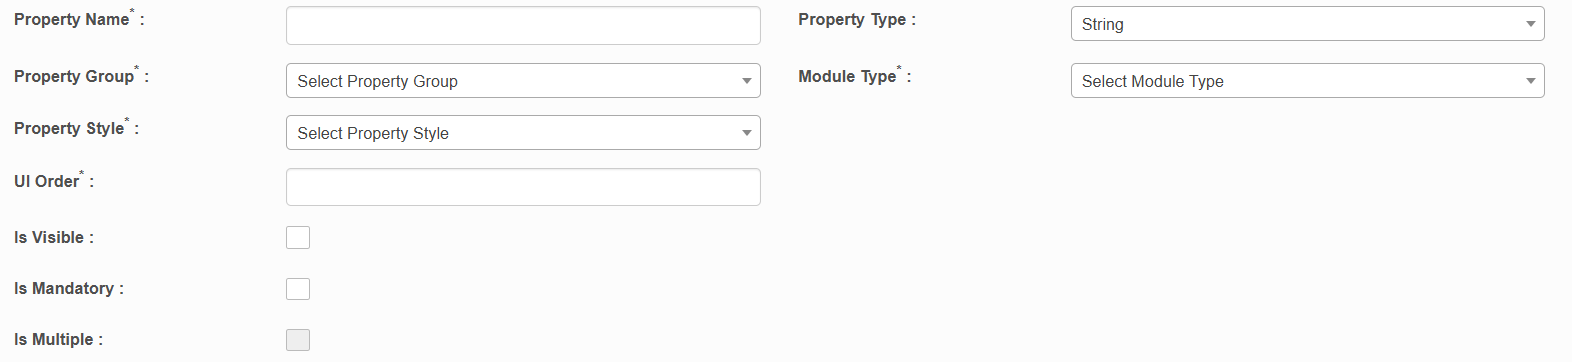
Enter the Property Name. |
|
3.
|
In the Property Type, Property Group, Module Type, and Property Style fields, click the drop-down list and select the applicable item. |
|
4.
|
In the UI Order field, type the number for the order in which this property is to display. |
|
5.
|
In the Is Visible, Is Mandatory, and Is Multiple fields, select if these are required. |
|
6.
|
When all selections/entries are made, click Save. |
Edit Procurement Properties
| |
Not all functions include an option to edit record line items shown in the main window. |
|
1.
|
Navigate to the window containing the record to edit. |
|
2.
|
Click the line containing the record. The applicable window or dialog box displays. |
|
3.
|
Make the necessary modifications. |
|
4.
|
Click Save or Add, as applicable. |
When editing an existing item, other options may be available, such as adding , , and and viewing .
| |
The options change based upon the function; therefore, not every option may be shown. |
Delete Procurement Properties
| |
Deleting is a permanent action and cannot be undone. Deleting may affect other functionality and information in the application such as data in configured reports, fields in windows, selectable options, etc. Therefore, be sure to understand the potential effects before making a deletion. |
|
1.
|
Click the line that contains the item to delete. |
|
2.
|
From the Select Actions drop-down list, choose Delete. If a confirmation message is displayed, take the appropriate action (for example, click OK or Continue). |
Other Functions and Page Elements